Overview
Learn how to play Anivia with this guide covering her unique zone-control kit, wall placement, optimal builds, teamfight positioning, early game survival, and matchup tips to help you climb ranked with this powerful control mage.
Table of Contents
- Understanding Anivia’s Unique Kit
- Mastering Wall Placement
- Optimizing Your Build Path
- Team Fight Positioning
- Surviving the Early Game
- Conclusion
- Frequently Asked Questions
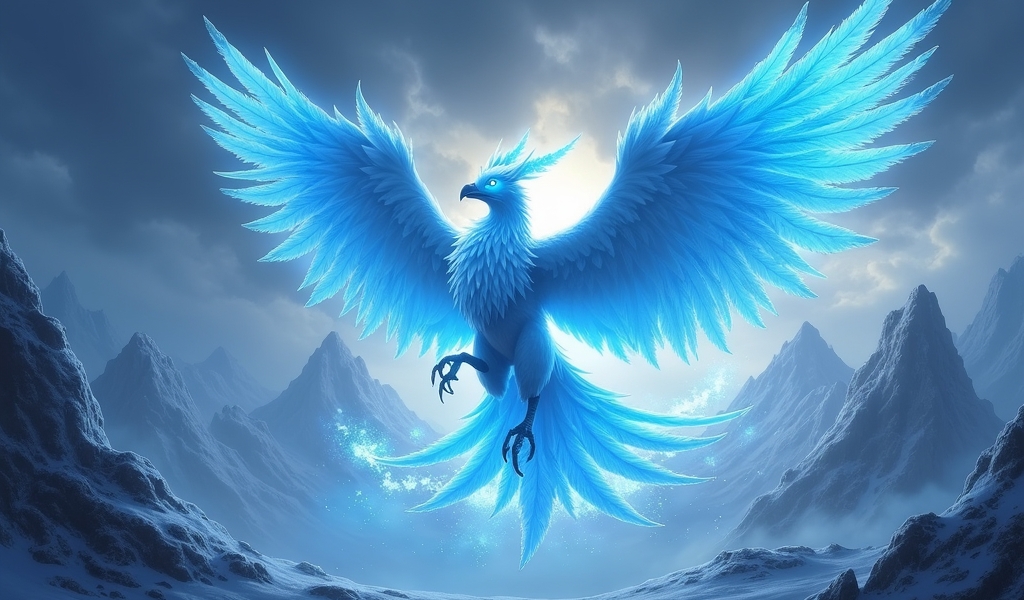
Mastering Anivia, the Cryophoenix, can be a game-changing addition to your League of Legends champion pool. As one of the most unique control mages in the game, learning how to play Anivia effectively requires understanding her distinctive kit and playstyle. This guide will walk you through essential tips for dominating with this icy champion in Season 14, helping you climb the ranked ladder with her formidable zone control and burst damage potential.
Understanding Anivia’s Unique Kit
Before diving into advanced strategies on how to play Anivia, it’s crucial to understand what makes her kit special. Anivia’s abilities create a synergistic combo that rewards patient and strategic gameplay. Her passive, Rebirth, gives you a second chance in fights by transforming into an egg when taking fatal damage, potentially reviving with full health.
Her Q (Flash Frost) is a slow-moving skillshot that stuns enemies it passes through and can be detonated manually for AoE damage. This ability is the foundation of most of her combos and setting up kills. When learning how to play Anivia effectively, practice landing this skillshot consistently.
Anivia’s W (Crystallize) creates an impassable ice wall that can separate enemies, block paths, or force flashes. This ability alone makes her one of the most influential zoning champions in the game.
Her E (Frostbite) deals bonus damage to chilled targets (those hit by Q or standing in her ultimate). This is your primary damage spell when trading or all-in situations.
Finally, Anivia’s R (Glacial Storm) creates a persistent area of effect that slows and damages enemies while applying the chill effect. Managing this ability’s mana cost and placement is key to controlling objectives and teamfights.

Mastering Wall Placement
Anivia’s Crystallize (W) is arguably one of the most unique and impactful non-ultimate abilities in League of Legends. Mastering wall placement is essential when learning how to play Anivia at a high level. A well-placed wall can completely change the outcome of a teamfight or secure objectives for your team.
In lane, use your wall to cut off enemy escape routes when your jungler ganks. Position it slightly behind the enemy to force them to walk toward you or burn Flash. This creates easy setups for your Q stun and full combo.
During skirmishes around objectives like Dragon or Baron, walls can separate the enemy team, allowing your team to create advantageous 5v4 or 5v3 scenarios. For instance, walling off the enemy jungler before a smite fight can secure objectives without contention.
One advanced technique is to use walls to interrupt enemy dashes or movement abilities. With perfect timing, you can cancel abilities like Jarvan’s E-Q combo or Lee Sin’s Q. This requires practice but can be game-changing when executed correctly.
Remember that your wall can also help teammates escape dangerous situations. When an ally is being chased, placing a wall between them and their pursuers can be the difference between life and death. Getting coaching can significantly help you master these advanced wall placements faster.
Don’t underestimate the psychological impact of good wall usage. Consistently blocking enemy paths will frustrate opponents and may cause them to make mistakes or focus you unnecessarily in teamfights, opening opportunities for your carries.
Optimizing Your Build Path
Building Anivia correctly is crucial to maximizing her potential throughout all game stages. Her item choices should reflect both the game state and your playstyle when learning how to play Anivia effectively.
For starting items, Tear of the Goddess is almost always essential due to Anivia’s high mana costs. Begin with a Lost Chapter component to help with lane sustain, then work toward completing Archangel’s Staff for the mana pool you’ll need in extended fights.
Your mythic item choice should adapt to the enemy composition. Liandry’s Anguish works well against tanky teams, while Luden’s Tempest provides burst and movement speed against squishier compositions. If you’re facing heavy healing, consider rushing Morellonomicon after your mythic.
Defensive options are important for Anivia since she lacks mobility. Zhonya’s Hourglass provides crucial survivability against assassins and dive compositions. Against heavy magic damage, Banshee’s Veil can be life-saving.
For boots, Sorcerer’s Shoes are standard for the magic penetration, but consider Mercury Treads against heavy CC teams. Ability haste from Ionian Boots of Lucidity can also be valuable for more frequent wall placements and ultimates.
Late-game items should focus on amplifying your damage and zone control. Rabadon’s Deathcap dramatically increases your damage output, while Void Staff helps penetrate enemy magic resistance. Official champion stats show that Anivia scales exceptionally well with AP items that complement her kit.
Remember that Anivia’s builds can be flexible. Don’t hesitate to adapt based on your team’s needs and the specific threats you’re facing. Sometimes, utility items like Rylai’s Crystal Scepter can provide additional control that your team desperately needs.
Team Fight Positioning
Proper positioning is arguably the most critical aspect of playing Anivia effectively in team fights. As an immobile mage with enormous zone control potential, where you stand can make or break your impact on the battle.
Always position yourself behind your frontline, ideally with your tanks or bruisers between you and the enemy team. This safety allows you to freely cast your abilities without immediate threat. Remember that Anivia thrives when enemies have to come to her, not the other way around.
When setting up for objectives like Dragon or Baron, arrive early to establish control with your ultimate (R) in choke points. This forces enemies to either walk through your storm, taking damage and becoming vulnerable to your E, or find alternative (and usually longer) paths to the objective.
Use terrain to your advantage. Positioning near walls gives you fewer angles to defend and makes your own wall (W) more effective by creating narrower corridors. The jungle is particularly advantageous for Anivia’s kit as it naturally funnels enemies into your abilities.
Be mindful of flanking threats like assassins or divers. Having vision control around team fights is especially important for Anivia since she can’t easily escape once engaged upon. This is where understanding proper warding techniques becomes essential.
While your egg passive provides a second chance, don’t rely on it as a crutch. Positioning safely should be your priority, with your passive serving as an emergency backup. Smart enemies will camp your egg form if you’re consistently using it as a substitute for good positioning.
Finally, remember that Anivia excels at counter-engagement. Sometimes the best play is to let enemies commit to a fight, then punish their aggression with your full combo when they’re already committed. Professional coaching can help you recognize these counter-engagement opportunities more consistently.

Surviving the Early Game
Anivia’s early game is notoriously challenging, and understanding how to play Anivia through this phase is critical to reaching her powerful mid and late game. Her high mana costs, slow auto-attack animation, and vulnerability to all-ins make the first few levels particularly difficult.
Focus on safe farming with auto attacks and occasional abilities during levels 1-5. Don’t waste mana trying to harass enemies unless you’re confident you can land your full Q-E combo. Each missed Q represents a significant portion of your mana pool wasted.
Ward diligently, especially against mobile junglers who can easily punish your lack of escape tools. Position toward the side of the lane where your jungler is pathing when possible. This makes it easier for them to assist if you get ganked.
Learning to last hit under tower is essential, as many matchups will push you in. Practice the standard pattern: for melee minions, it’s typically two tower shots plus one auto attack; for ranged minions, one auto attack, one tower shot, then one more auto attack.
Your egg passive should be respected by enemies in the early game, as it’s difficult to kill without committing significant resources. Use this to your advantage by playing slightly more aggressively when your passive is up, but don’t rely on it excessively as good opponents will coordinate with their jungler to punish it.
Once you reach level 6, your lane presence increases dramatically. Your ultimate allows for much better waveclear, enabling you to push and roam or simply maintain lane priority. This is when you can start helping your jungler secure Scuttle Crabs or invade enemy jungle camps. If your jungler is someone like Amumu, your level 6 power spike can easily help secure Scuttle or turn early fights with your R + wall combo.
Remember that your goal in the early game isn’t necessarily to dominate lane – it’s to reach your power spikes without falling significantly behind. As pointed out by professional guides, Anivia’s win rate jumps significantly after the 25-minute mark, showing her true strength is in the mid to late game.
Conclusion
Mastering how to play Anivia requires patience, practice, and strategic thinking. Her unique kit offers tremendous control over the battlefield that few other champions can match. From her game-changing wall placements to her devastating AoE damage potential, Anivia rewards players who invest time in understanding her strengths and limitations.
Remember that positioning is key with this immobile mage. Stay safe behind your frontline, use terrain to your advantage, and control chokepoints with your ultimate and wall. While her early game may be challenging, persevere through it to unleash her formidable mid and late-game potential.
By focusing on these five essential aspects of Anivia gameplay—understanding her kit, mastering wall placement, optimizing builds, positioning correctly, and surviving the early game—you’ll be well on your way to dominating the Rift with the Cryophoenix.
Like any complex champion, true mastery comes with experience. Don’t be discouraged by initial setbacks; instead, learn from each game and continuously refine your approach. Soon enough, you’ll be freezing enemies in their tracks and carrying your team to victory with this powerful control mage.
Frequently Asked Questions
Is Anivia good for beginners in League of Legends?
Anivia has a moderate-to-high learning curve and isn’t typically recommended for absolute beginners. Her immobility, skillshot-dependent damage, and mana management challenges can be frustrating for new players. However, if you’re patient and willing to invest time in mastering her unique mechanics, she can be incredibly rewarding. Beginners determined to learn Anivia should focus first on landing her Q consistently and managing mana effectively before advancing to more complex wall techniques.
What runes work best for Anivia?
For primary runes, Arcane Comet in the Sorcery tree works exceptionally well with Anivia’s kit, as her slows ensure the comet hits consistently. Pair this with Manaflow Band (crucial for mana sustain), Transcendence (for ability haste), and Gathering Storm (for scaling). In the secondary tree, Inspiration with Biscuit Delivery and Time Warp Tonic helps with early game sustain, while Presence of Mind and Coup de Grace from Precision can boost your damage output and mana regeneration in teamfights. Against assassins, consider Resolve secondary with Bone Plating and Overgrowth for survivability.
How do I deal with assassins when playing Anivia?
Against assassins, your wall (W) is your best friend. When they attempt to engage, place your wall between you and them to disrupt their combo. Build defensive items early – Rush Seeker’s Armguard against AD assassins or Verdant Barrier against AP threats. Take Barrier or Exhaust as your second summoner spell. Position conservatively in lane, and use your ultimate to waveclear from a safe distance rather than stepping up to auto-attack minions. If they roam, ping teammates and push the wave to punish their absence. Remember that your egg passive gives you a second chance, so positioning near your tower when it’s up can bait failed dive attempts.
When should I pick Anivia in champion select?
Anivia excels against immobile compositions and teams that want to engage in bottlenecked areas like the jungle or around objectives. She’s a strong pick when your team needs wave clear, zone control, or objective security. She counters champions that need to get close to deal damage (like Udyr, Volibear, or Garen) by kiting them with her slows and wall. Avoid picking her into long-range poke compositions that can damage her from outside her zone of control, or against teams with multiple dash abilities that can easily bypass her wall. She’s particularly strong on maps with many choke points, making her excellent for objective-focused gameplay.
How do I maximize Anivia’s damage combo?
Anivia’s full damage combo revolves around applying and capitalizing on her “chilled” effect. Start by landing your Q (Flash Frost) but don’t detonate it immediately – let it pass through the enemy. Once it’s passed through, detonate it to apply the stun and chill effect. Immediately follow with E (Frostbite) to deal double damage against the chilled target. For extended trades, place your R (Glacial Storm) beneath them before hitting E, as enemies standing in your ultimate are continuously chilled. For maximum burst, the order should be: land Q → cast R under enemy → detonate Q → cast E. This ensures they remain chilled throughout the entire combo, maximizing your damage output.